Managing Media Image Styles in Drupal 8
Drupal 8 has been around for just about 3 years now and, up until a recent release, hasn’t had a decent way to manage and reuse images. The Media module is finally stable enough to use in a production environment, however, there is a pretty big caveat. Since everything in Drupal 8 is considered an entity, media being no exception, you cannot simply apply an image style to your image in the Manage display tab as you could in Drupal 7.
In this article, we’ll go over creating media view modes, setting the image media type’s display for each view mode using an image style and updating the display for each entity field that references an image media type. Things to consider before starting Using the same image media type across multiple entities — or even multiple fields in the same entity — will lose you the ability to set image-specific field settings. Personally, I don’t consider this to be an issue. All settings will apply to all images. A “Maximum upload size” is recommended since minimum and maximum image resolution cannot be set. These resolutions will be set in your image styles.
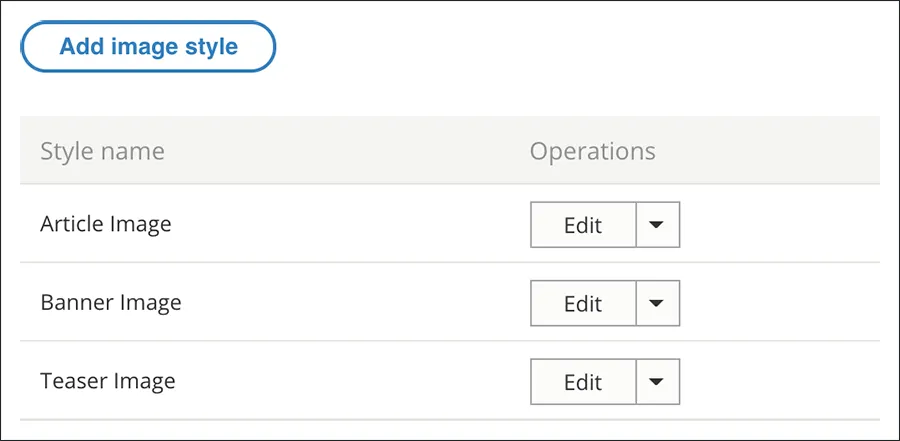
Step 1: setup image styles
Go to Configuration > Media > Image styles and define the styles your project needs. If you don’t know them all now, that is OK; you can always repeat these steps for additional styles. For this article, I will use “Article Image,” “Banner Image” and “Teaser Image” as my image styles.
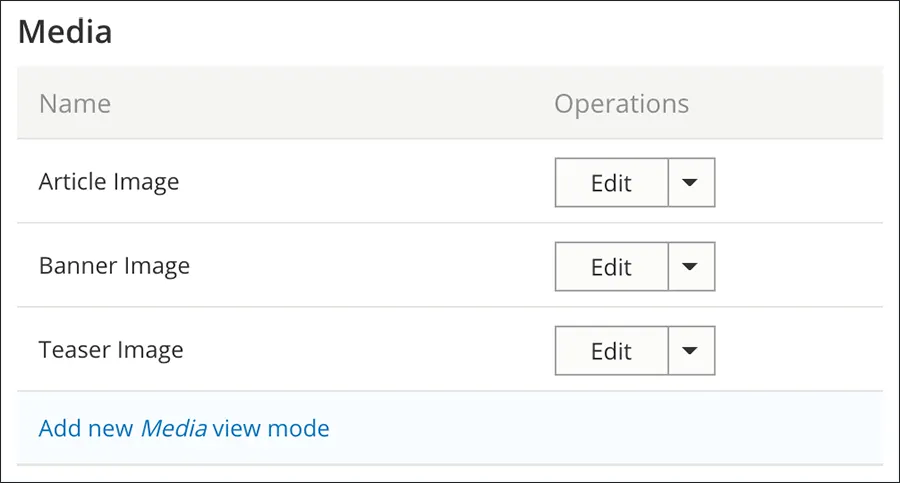
Step 2: setup media view modes
Go to Structure > Display modes > View modes and navigate to the “Media” section. Add your media view modes. Do you still have the image style names handy? You should, because you’ll need them here. The name of your view mode MUST match your style name.
Step 3: manage media display
Once you’ve created all your media view modes, go to Structure > Media types > Image > Manage Display and enable all your custom displays.
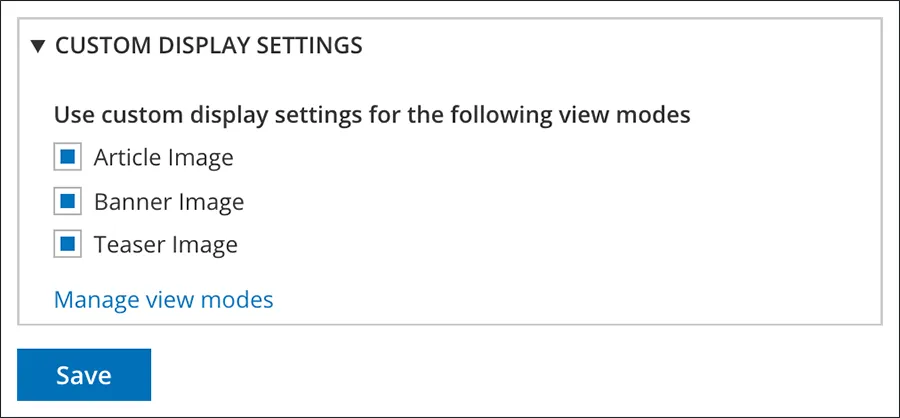
Now that these are enabled, go to each display, find the image field and make sure its format is “Image.” Click the gear icon and set the image style.
Repeat for your remaining displays.

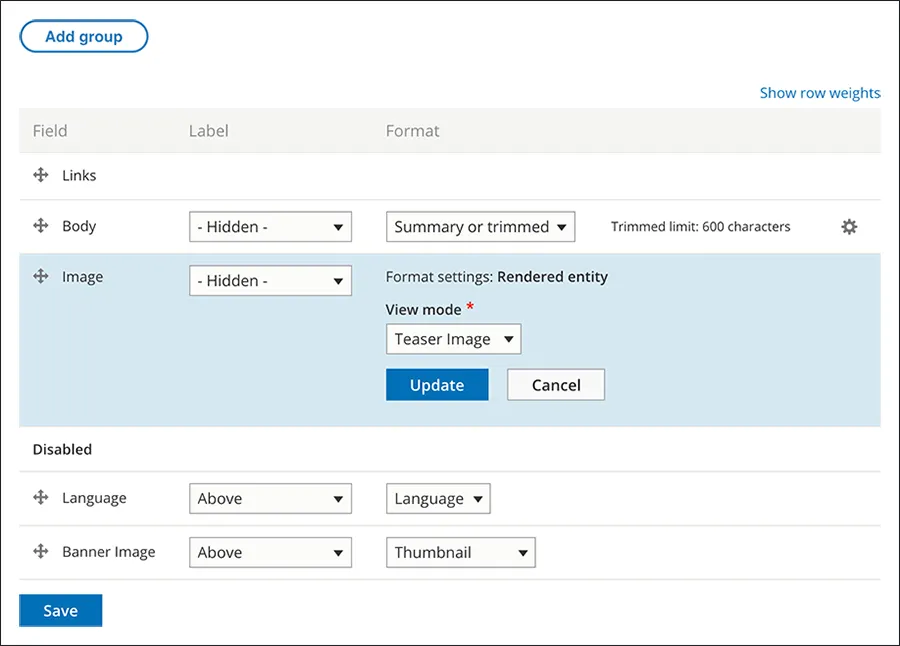
Step 4: manage entity display
This is it, the last step, where all your hard works pays off. I’m going to review how I setup fields in a content type, but this process can be used on any entity that allows you define fields.
Go to the Manage display tab of your content type, “Article” in my case. For the Default display, I set the “Rendered entity” view mode to “Article Image.” Now every article node when displayed with this mode, the image field will render using that style.
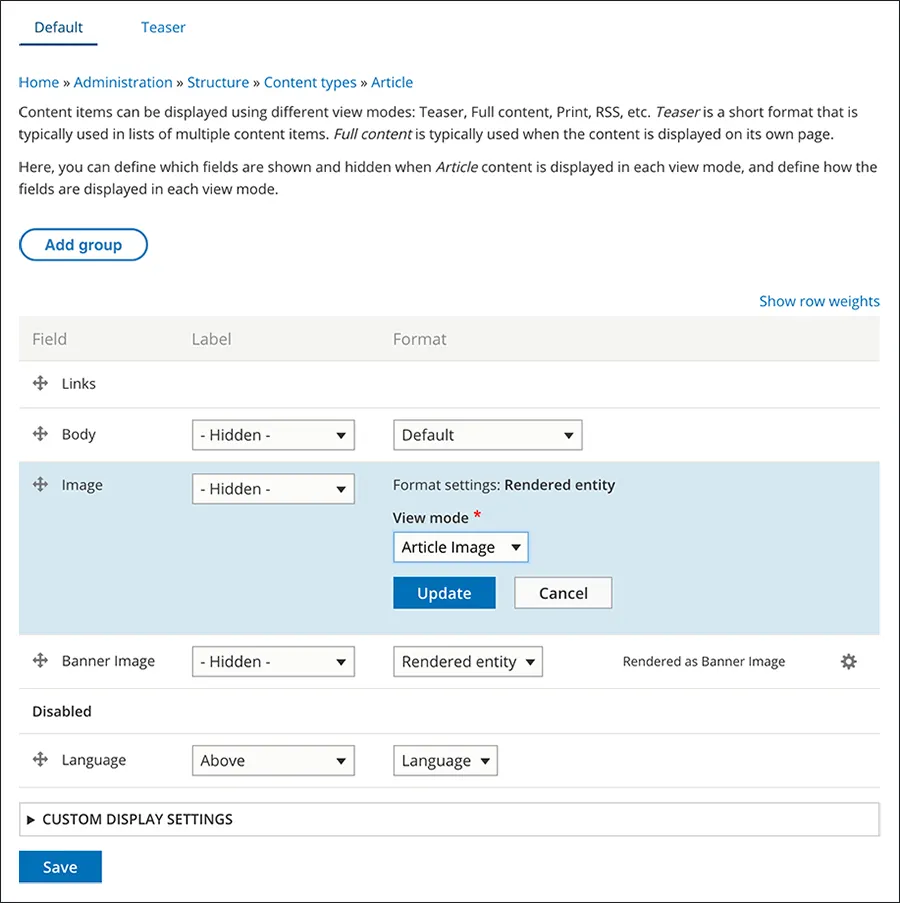
Repeat this for each of your entity displays, and you’re all set.
Conclusion
Managing image styles with media inside Drupal 8 doesn’t have to be complicated, it just takes a bit of effort and preplanning.
If you have any questions about media image styles, feel free to ask in the comments section!